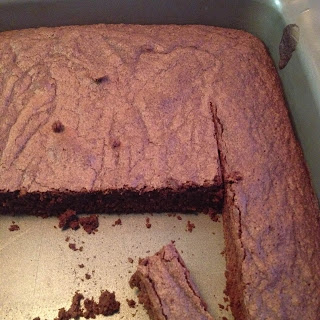
Taylor made these brownies for her 14th birthday party in November, because she doesn’t like cake. Yes, she has unusual food preferences and a “discriminating palate” - which is just a nice way of saying she’s a picky eater. These are one of Taylor’s favourite things to make - and eat - and she often makes these for class parties or a potluck.
 |
| Taylor (second from the right) and her friends in a private party room at a Karaoke bar |
When Mom lived at the “Rosemount Centre for Seniors” she would walk down Rosemount Av with Taylor and Mitchell and I, and we would have lunch at Wellington Sandwiches. The kids called this sandwich shop “Phil’s” - short for Philomena, the name of the owner and cook. Everyone’s favourite thing about Phil’s was the brownies. When a friend in the neighbourhood made me brownies for a birthday gift we all loved them so much we asked for the recipe. Turns out the recipe is from the container of Fry’s Cocoa. They are fudgy on the inside with a nice “crust” on top. Phil’s have a thick layer of icing, but we’ve tried these with icing and decided they don’t need it. So here you go, the recipe.
Taylor’s Fudgy Brownies

Preheat oven to 350°F
Ingredients:
1 ⅓ cups All Purpose flour
1 teaspoon baking powder½ teaspoon salt
1 cup butter
1 cup cocoa
2 cups sugar
4 eggs
1 ½ teaspoons vanilla
1 cup chopped nuts (optional)
Instructions:
Stir together flour, baking powder and salt in a small bowl.
Melt butter in a large saucepan. Remove from heat. Stir in cocoa. Blend in dry
ingredients and nuts (if using). Pour batter into greased 13 x 9 x 2-inch (3.5
L) rectangular baking pan. Bake 30-35 minutes until done (less time if it's in a dark pan).
Baking Tips:
Measuring margarine and butter:
Melting butter:
Rather than melting butter in a saucepan (as the recipe calls for) and then adding the other ingredients to the saucepan, you can melt butter in the microwave and then use a stand mixer to mix the batter. However, you need to be careful if you melt butter in the microwave. Cut the butter into small pieces and cover the glass bowl with paper towel; this can help prevent splattering or getting scalded. Melt on a low temperature or on "defrost" and keep an eye on it because you don't want it to boil or burn. Check it every 10-15 seconds until it is almost melted, with just a few solid pieces remaining (items in the microwave continue to cook after they are removed). Remove from the microwave and stir until it's completely melted.
Measuring margarine and butter:
My mom used to buy margarine in ½ cup squares, to make measuring easier. If you don’t want to use margarine you can buy sticks of butter; one stick is ½ cup. The wrapper also has measurements for smaller amounts like tablespoons. Save the foil or wax paper wrapper and use it to grease the pan when you’re baking.
Melting butter:
Rather than melting butter in a saucepan (as the recipe calls for) and then adding the other ingredients to the saucepan, you can melt butter in the microwave and then use a stand mixer to mix the batter. However, you need to be careful if you melt butter in the microwave. Cut the butter into small pieces and cover the glass bowl with paper towel; this can help prevent splattering or getting scalded. Melt on a low temperature or on "defrost" and keep an eye on it because you don't want it to boil or burn. Check it every 10-15 seconds until it is almost melted, with just a few solid pieces remaining (items in the microwave continue to cook after they are removed). Remove from the microwave and stir until it's completely melted.
In the "olden days" (as my kids say) they would take a piece of straw from a broom to test a cake (or brownies) but you can use a wooden toothpick. Test to see if they are done by poking the centre of the brownies and if the toothpick comes out clean they are done. If dough sticks to the toothpick they are not finished yet. When they are done the edges will look dry and start to pull away from the side of the pan. If you wait too long the edges will start to burn.
 |
| We have a non-stick Pyrex baking pan with a plastic lid for carrying - it has seen a lot of use! |


No comments:
Post a Comment